First steps
First flights in FPV goggles – preparation and the flight itself
Make your first FPV goggle flight after simulator practice, with an observer, low over an empty field. How to prepare the drone, goggles, site and flight.
- By Power Technology training team
- 9 min read
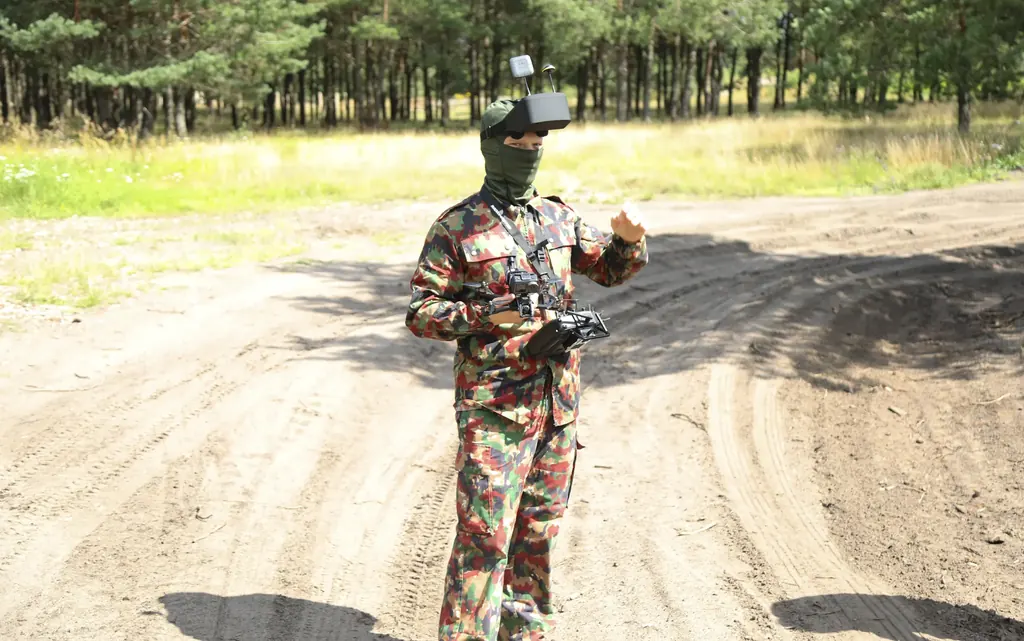
You are ready for your first flight in FPV goggles when you can take off, fly figures of eight and land comfortably in a simulator, and your drone is configured and checked without propellers. The flight itself is a few short, low passes over an empty, open space, with an observer at your side and one goal: to master throttle and orientation, not to do aerobatics. Formalities such as registration, competency, insurance and flight notification are dealt with beforehand, at home.
The simulator before your first pack
An FPV drone in acro mode does not level itself: when you let go of the sticks, it keeps flying at the same angle. This is not worth learning in a field, because every mistake ends in broken propellers. That is what a simulator is for, e.g. Liftoff, Velocidrone, Uncrashed, DRL Simulator or Tryp FPV. You connect your radio to the computer over USB as a joystick and practise on the same sticks you will fly with.
Before you go out into the field, master in the simulator:
- a smooth take-off and a hover at a constant height for a dozen seconds or so,
- straight-line flight and turns in which you combine roll with yaw,
- figures of eight around two points at low height,
- a controlled landing and immediately disarming the motors after a crash.
Set the same rates and the same camera angle in the simulator as on your drone. If after a few sessions you have stopped crashing every minute and you land where you want to, you are ready for the field.
Angle mode, in which the drone levels itself, can be tempting for a first flight. You can use it for your first hover, but do not stay in it for long: it gets you used to different control from acro and makes it harder to change your habits later.
Formalities to have behind you
Before your first flight in the field, make sure you meet the legal requirements:
- you are a registered operator (in the EU country where you live) and the operator number is on the drone – a drone with a camera requires registration regardless of its weight1;
- you have A1/A3 competency – it is mandatory for every flight in subcategory A3, which includes flights with a drone heavier than 250 g2;
- in Poland, for a drone weighing from 250 g to 20 kg, you have third-party liability insurance3;
- in Poland, before take-off you notify the flight in the DroneTower app, and after landing you close the notification34;
- you have checked the geographical zones on DroneMap5;
- an observer stands next to you, or you fly within the limits of the temporary exemption issued by the Polish Civil Aviation Authority (ULC), valid until 12 October 2026, including a maximum of 50 m above the ground67.
For your first flights, take an observer anyway, even if the exemption allows you to fly without one. A second pair of eyes sees what the goggles do not show: a walker coming onto the field, a dog, a low-flying helicopter.
Configuring the drone and goggles on the bench
Make all settings without propellers. Fit them only when everything works.
- Assign motor arming to a separate two-position switch, away from the flight mode switch.
- Check the failsafe: arm the drone without propellers and switch off the radio – the motors must stop or the drone must enter the programmed lost-link procedure. EASA recommends that the lost-link recovery function be set appropriately for the planned operation8.
- Set up a buzzer or the beeper function on a switch – it will come in handy when searching for the drone in grass.
- Check the directions of motor rotation and that they match the propeller direction.
- Set the camera tilt angle to approx. 10–20°. A steeper angle forces you to fly fast to see the horizon.
- In an analogue system, choose a channel not used by other pilots and low video transmitter power; in a digital system, pair the goggles with the unit on the drone and switch on recording.
- Adjust the interpupillary distance and focus in the goggles, or fit corrective inserts. A blurred image tires you faster than you expect.
- Display the pack voltage and flight time in the OSD.
Place and conditions for the first flight
Look for a large, flat field with short grass, with no trees in the middle, away from roads and power lines. A drone heavier than 250 g flying in subcategory A3 must be kept at least 150 m from residential, commercial, industrial and recreational areas, in a place where you do not endanger uninvolved people9. Choose a day with light wind, good visibility and the sun behind you – flying into the sun blinds the camera.
Before you set up your equipment, walk the site. Check for obstacles, people, animals and a place for an emergency landing – EASA also recommends this kind of reconnaissance in its material for the Regulation8. Agree short commands with your observer, e.g. "stop", "up", "land", "person on the left", and where you will both stand.
The observer is not a spectator. They stand right next to you, watch the drone rather than a phone screen, and speak briefly when necessary. In goggles, you do not turn your head towards them; you answer by voice. Also agree in advance what you will do if the observer loses sight of the drone: you then turn back towards the take-off point or land.
The first flight step by step
- Check in on DroneTower.
- Switch on the goggles, then the radio, and finally connect the pack to the drone standing on the ground. With analogue, switching the goggles on first lets you check that nobody is transmitting on your channel.
- Wait for the initialisation signals and check the image, the OSD and the pack voltage.
- Step a few metres away from the drone and confirm with your observer that the area is clear.
- Arm the motors and smoothly lift the drone to 2–3 m. Hover and correct the height with the throttle alone.
- Fly slowly straight ahead, make a wide turn and come back. Keep a constant height and do not go far.
- After 2–3 minutes, or when the voltage drops to approx. 3.5–3.6 V per cell, land and disarm the motors immediately10.
- Disconnect the pack, close the check-in and note down what went well and what needs improving.
Spend the next packs on the same thing, gradually lengthening the straights and adding figures of eight. Speed and aerobatics will come by themselves once orientation stops taking up all your attention.
Exercise plan for the next packs
Instead of flying aimlessly, give each pack one task. An example progression for the first sessions:
- Hover and land on a marked spot, e.g. next to a rucksack – several times within one pack.
- Straight lines there and back at a constant height of approx. 2–3 m, with a 180° turn at the end.
- A large circle around one point, e.g. a lone tree, with the camera always pointing in the direction of flight.
- Figures of eight around two points, wide and slow at first, then tighter.
- Gentle climbs and descents on a straight, without changing direction.
Move on to the next exercise only when you can do the previous one consistently. If something stops working, go back a step – in the field or in the simulator, where a repeat costs nothing.
When something goes wrong
- Crash – disarm the motors immediately. Do not try to rescue the drone with throttle in branches or tall grass, because you will burn out a motor or ESC. Use turtle mode only on open, flat ground.
- Breaking-up image – do not fly on blind. If the area under the drone is clear, climb gently and turn back towards the take-off point. If the image does not come back, disarm the motors over empty ground, and the observer will note where the drone came down.
- Lost drone – replay the last few seconds of the goggle recording, switch on the buzzer and search from the last known point.
- Someone enters the flight area – increase the distance or stop the flight. In subcategory A3 you must adapt the operation and stop it if you cannot ensure that person's safety9.
- A low-flying aeroplane or helicopter – descend low immediately and land if you cannot keep a safe distance. Avoiding collisions is the drone pilot's responsibility8.
Fatigue, nausea and session length
At first, the image in the goggles can cause nausea, especially after long simulator practice with high rates. Start with short flights, take breaks and sit on a chair while flying – a stable position helps. The first session is 3–5 packs, no more. Fatigue lowers concentration, and a pilot who is not fit to fly safely because of fatigue, illness or medication should not fly11.
After the session, review the goggle recording. You will see when you were losing height, why your turns were uneven and where the observer had to warn you. It is the cheapest lesson you will ever get.
Key points
- Go out to the field only once you can take off, fly figures of eight and land comfortably in a simulator.
- Before flying, have your registration, the operator number on the drone, competency and – in Poland – liability insurance for drones from 250 g, a DroneTower check-in and the zones checked.
- Configure without propellers, and test the failsafe and the arming switch before the first take-off.
- First flights are low, short and slow, over an empty field, with an observer standing next to you.
- After a crash, disarm the motors immediately, and after the session analyse the goggle recording.
Commission Implementing Regulation (EU) 2019/947, Article 14(5) and (8) (consolidated text, EUR-Lex): https://eur-lex.europa.eu/legal-content/EN/TXT/?uri=CELEX:02019R0947-20250501 ↩
Regulation (EU) 2019/947, Annex, Part A, UAS.OPEN.020 and UAS.OPEN.040 (consolidated text, EUR-Lex): https://eur-lex.europa.eu/legal-content/EN/TXT/?uri=CELEX:02019R0947-20250501 ↩
Polish Aviation Law Act of 3 July 2002 (Journal of Laws of 2025, item 1431), Article 156a(2) and Article 209(1a) (in Polish): https://isap.sejm.gov.pl/isap.nsf/DocDetails.xsp?id=WDU20250001431 ↩ ↩
Polish Air Navigation Services Agency (PANSA), DroneTower: https://www.pansa.pl/dronetower/ ↩
Polish Air Navigation Services Agency (PANSA), DroneMap: https://dronemap.pansa.pl/ ↩
Regulation (EU) 2019/947, Annex, UAS.OPEN.060(4); EASA, FAQ – I am into drone racing and/or flying drones with goggles (FPV), open category: https://www.easa.europa.eu/en/the-agency/faqs/i-am-drone-racing-andor-flying-drones-goggles-fpv-open-category ↩
Civil Aviation Authority of Poland (ULC), FPV – decision of the President of ULC No. LBSP.503.1.2026.ULC.1 (in Polish): https://ulc.gov.pl/drony/odstepstwa-altmoc/fpv ↩
EASA, AMC1 UAS.OPEN.060(1)(c) and (1)(d) and GM1 UAS.OPEN.060(2)(b) (Easy Access Rules for Unmanned Aircraft Systems, June 2026 edition): https://www.easa.europa.eu/en/document-library/easy-access-rules/easy-access-rules-unmanned-aircraft-systems-regulations-eu ↩ ↩ ↩
Regulation (EU) 2019/947, Annex, UAS.OPEN.040(1) and (2) and AMC1 UAS.OPEN.040(1) (EASA, Easy Access Rules for UAS): https://www.easa.europa.eu/en/document-library/easy-access-rules/easy-access-rules-unmanned-aircraft-systems-regulations-eu ↩ ↩
Oscar Liang, Using LiPo Batteries for FPV Drones – Beginner's Guide: https://oscarliang.com/lipo-battery-guide/ ↩
Regulation (EU) 2019/947, Annex, UAS.OPEN.060(2)(a) (consolidated text, EUR-Lex): https://eur-lex.europa.eu/legal-content/EN/TXT/?uri=CELEX:02019R0947-20250501 ↩