
In the field
FPV pre-flight checklist – equipment, rules and site
Before an FPV flight, check qualifications and zones, site and weather, drone and link, then your observer and video channels. A full step-by-step list.
- By Power Technology training team
- 9 min read
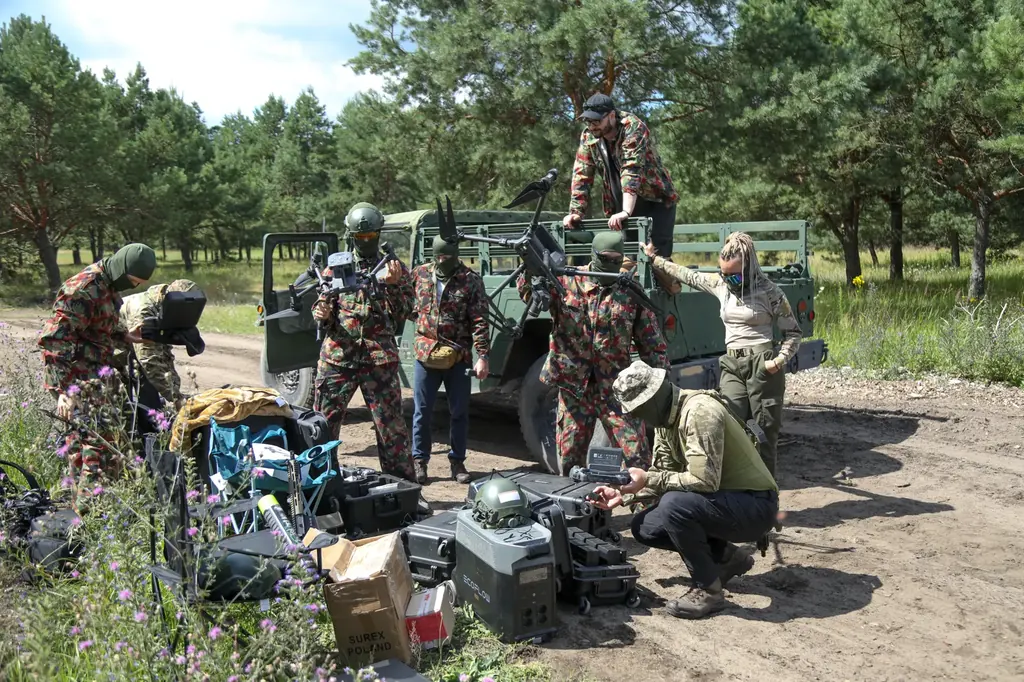
Before every FPV flight you go through five stages in a fixed order: rules and airspace zone, site and weather, the drone's condition, the control and video link, and the briefing with your observer. You arm the motors only when every item has been checked. The whole list takes a few minutes and catches the typical faults and mistakes that in the field end in a lost drone or a dangerous situation.
Why a checklist is worth having even for a short flight
In the field you work under pressure: the light is fading, a group is waiting, the wind is picking up. That is exactly when a loose propeller nut or the wrong video channel gets overlooked. A checklist does not assume you are careless – it assumes you are human. Professional pilots use checklists on every flight for the same reason.
| Stage | When | What it covers |
|---|---|---|
| 1. Rules and zone | Before you set off | Registration, qualifications, liability insurance, geographical zones |
| 2. Site and weather | On site, before unpacking | People, obstacles, wind, precipitation, fire risk |
| 3. Drone and radio | At your station | Propellers, motors, frame, antenna, camera, batteries |
| 4. Link and settings | After connecting the battery | Receiver binding, LQ, OSD, video channel, failsafe |
| 5. Observer and take-off | Immediately before the flight | Briefing, commands, take-off sequence |
Print this list or save it on your phone and go through it item by item, even if you fly every day.
Stage 1 – rules and zone: what to check before you set off
- You are registered as an operator and the operator number is stuck on the drone. If the drone has a remote identification system, the same number must be uploaded to it1.
- You have valid proof of completing the A1/A3 training and exam and can show it in the field.
- You have a third-party liability insurance policy. In Poland, since 13 November 2025 it has been mandatory for operators of drones weighing from 250 g to 20 kg2.
- You know which subcategory you are flying in. With a self-built FPV drone weighing 250 g or more you fly in subcategory A3: in a place where no uninvolved person will be endangered, and at least 150 m horizontally from residential, commercial, industrial and recreational areas3. A self-built drone lighter than 250 g, with a maximum speed below 19 m/s, may fly in A11. Throughout the open category the limit is 120 m from the closest point of the surface of the earth3.
- You have checked the geographical zones in the DroneTower app or on the DroneMap map. In Poland you fly in a geographical zone in line with its rules and after a check-in in DroneTower, and in some zones, e.g. DRA-R around controlled aerodromes, prior permission is required4.
- You have permission from the owner or manager of the land you are taking off from.
Stage 2 – site and weather on the spot
Once on site, open DroneTower again. Zones and restrictions may apply temporarily – the Polish Air Navigation Services Agency (PANSA) includes, among other things, restrictions announced by NOTAM – so a check from the previous day is not enough4.
Before you unpack anything, walk around the take-off spot and look around:
- People and animals. Are there uninvolved people in the flight area? Walkers, mushroom pickers and farm workers appear suddenly – agree with your observer what you will do if someone enters the flight area.
- Obstacles. Power lines, masts, guy wires and single tall trees are hard to spot in goggles. Memorise them before you put the goggles on.
- Take-off and emergency landing spot. Flat, without tall grass that winds itself into the motors.
- Wind. Check the forecast and the gusts, and on site watch the treetops. Strong wind pushes the drone around in a hover and shortens flight time.
- Precipitation and moisture. FPV drone electronics are usually not waterproof. Wet grass after landing can also do damage.
- Sun. Position yourselves so that the observer is not looking straight into the sun.
- Fire risk. On dry meadows and heathland, a crashed drone with a damaged battery can start a fire. Have a fire extinguisher and know which way the emergency services can get in.
Stage 3 – drone and radio at your station
Drone
- Propellers: no cracks, chips or bends, fitted in the right direction, nuts tightened.
- Motors: spin easily and evenly, without grinding; mounting screws do not reach into the windings.
- Frame: arms without cracks, frame screws tightened, camera securely mounted at the correct angle.
- Antennas: receiver and video transmitter antennas in place, away from the propellers, connectors not loose.
- Camera: lens clean, without scratches or dust.
- Battery mounting: strap and anti-slip pad in good condition – the battery must not be able to move.
Radio, goggles and batteries
- Radio charged, the correct model selected, all switches in their starting positions, and the arming switch definitely off.
- Goggles charged, set to your channel, recording (DVR) ready to start.
- Packs fully charged, balanced and undamaged. Check a pack again after a crash before connecting it to the drone.
What to have to hand at your station
- spare propellers, a nut wrench and a set of hex keys,
- insulating tape and cable ties,
- a fireproof battery bag and a fire extinguisher,
- a first aid kit and water,
- a charged phone and the exact location of your station, which you will give on the emergency number 112 if someone needs help.
Stage 4 – link and settings after connecting the battery
Before you connect the battery, make sure nobody is flying on the channel your video transmitter is about to start broadcasting on. If your system has a low-power mode on the ground (so-called pit mode), use it.
After connecting the battery, check in your goggles:
- the pack voltage in the OSD – does it correspond to a charged pack,
- link quality (LQ) and signal strength (RSSI in dBm) – is the radio connected to the receiver,
- warning messages in the OSD, e.g. that arming is disabled,
- the number of satellites and a saved home point if you use GPS Rescue – arming before it is saved means the drone will not know where to return to,
- the image – is it stable, without interference from other pilots.
Check the failsafe on the bench without propellers after every configuration change or firmware update. This is not a test to do in the field with the propellers on.
Video channels when flying in a group
When several pilots are flying on one field, agree the video channels before the first drone is switched on, not after the first interference. Everyone notes their channel and does not change it without warning. Before you connect the battery, say out loud which channel your drone is about to start transmitting on. Do not raise video transmitter power above the permitted limit to "punch through" interference – that only makes the image worse for others. If the image in your goggles suddenly deteriorates and someone has just connected a battery, land and sort the situation out together.
Stage 5 – briefing with the observer and take-off sequence
In the open category, when flying with goggles you need an observer. They must stand next to you, watch the drone at all times and be able to warn you immediately1. A short briefing before the first flight of the day should settle:
- where the observer stands and where the other members of the team stand,
- simple commands, e.g. "land", "climb", "people on the left", "aircraft",
- what you do if an aircraft or an uninvolved person appears – the drone immediately descends and lands in a safe place,
- which video channels the individual pilots are using, if you are flying in a group.
The take-off sequence itself is always the same:
- Put on your goggles and check that you are seeing the image from the right drone.
- Say out loud that you are taking off and wait for the observer's confirmation.
- Arm the motors and hover at low height for a few seconds.
- Check that the drone responds correctly to the sticks and that there is no vibration or drift.
- Only then climb and carry out the planned flight.
On the course in Borne Sulinowo we repeat this sequence at every take-off so that it becomes a habit.
When you do not take off
Cancel or postpone the flight when:
- you have no observer, or the observer cannot see the flight area,
- there are uninvolved people in the flight area and you cannot safely avoid them,
- the OSD shows an unstable link, warnings or a voltage that does not match a charged pack,
- after the hover the drone shakes, drifts or responds unevenly to the sticks,
- wind or precipitation clearly exceed the conditions in which you feel confident,
- you are tired, distracted or starting to rush.
After the flight – before you connect the next battery
- Disarm the motors, and only then approach the drone.
- Disconnect the battery and check its temperature and resting voltage.
- Touch the motors – a noticeably hotter motor may indicate damage or a bearing problem.
- Inspect the propellers, antennas and camera, even if the flight went without a crash.
- Record the pack number, flight time and any remarks in your log.
- Let the battery and motors cool down before the next flight.
If anything worried you during the flight – an unusual sound, image vibration, a drop in LQ – note it down and check it before the next take-off. Faults rarely go away on their own, and a minor symptom often comes before a more serious failure.
Key points
- Go through the five stages always in the same order: rules, site, equipment, link, observer.
- Before you set off, check your registration, A1/A3 competency, liability insurance and the geographical zones in DroneTower.
- On site, assess people, obstacles, wind, moisture and fire risk before you unpack anything.
- Before connecting the battery, make sure your video channel will not interfere with another pilot.
- Flying with goggles in the open category requires an observer standing next to you and agreed commands.
- After every flight, inspect the drone and the battery before you prepare the next flight.
EASA, Drones (UAS) – frequently asked questions (operator and pilot obligations, flying with FPV goggles): https://www.easa.europa.eu/en/the-agency/faqs/drones-uas ↩ ↩ ↩
Financial Ombudsman (Rzecznik Finansowy), Compulsory third-party liability insurance for drone operators (in Polish): https://rf.gov.pl/obowiazkowe-ubezpieczenie-oc-dla-operatora-drona/ ↩
EASA, Easy Access Rules for Unmanned Aircraft Systems – UAS.OPEN.010 and UAS.OPEN.040: https://www.easa.europa.eu/en/document-library/easy-access-rules/online-publications/easy-access-rules-unmanned-aircraft-systems ↩ ↩
Polish Air Navigation Services Agency (PANSA), Geographical zones (in Polish): https://www.pansa.pl/strefy-geograficzne/ ↩ ↩